If you want to broadcast a show, you'll need an access to our program scheduler. We use libretime. A full and complete documentation is hosted at : https://libretime.org/guides
This tutorial only explain the two simple ways to broadcast on the TTnode DAB+, for more elaborate kind of content, please get in touch with the crew.
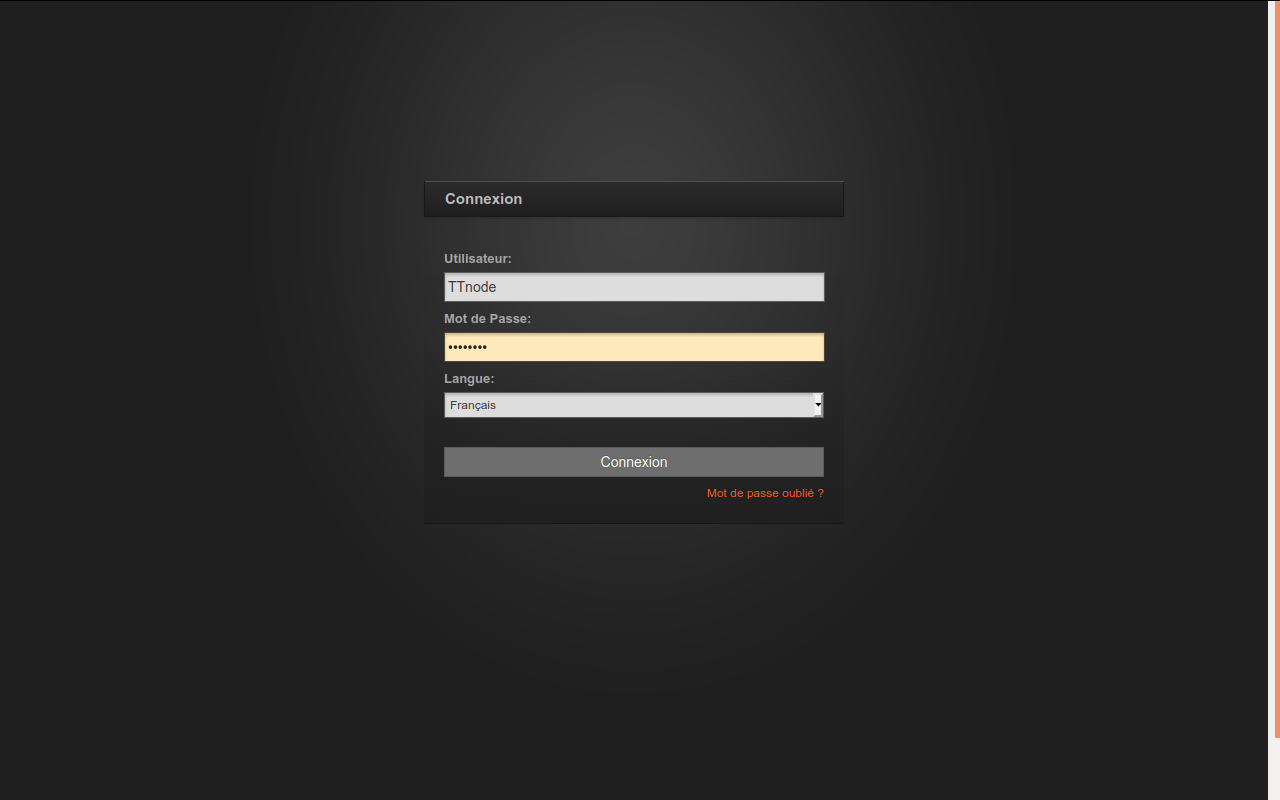
Get an access to our libretime. You can get one by asking the TTnode team.
https://air3.p-node.org/login
careful ! user access is https only !!
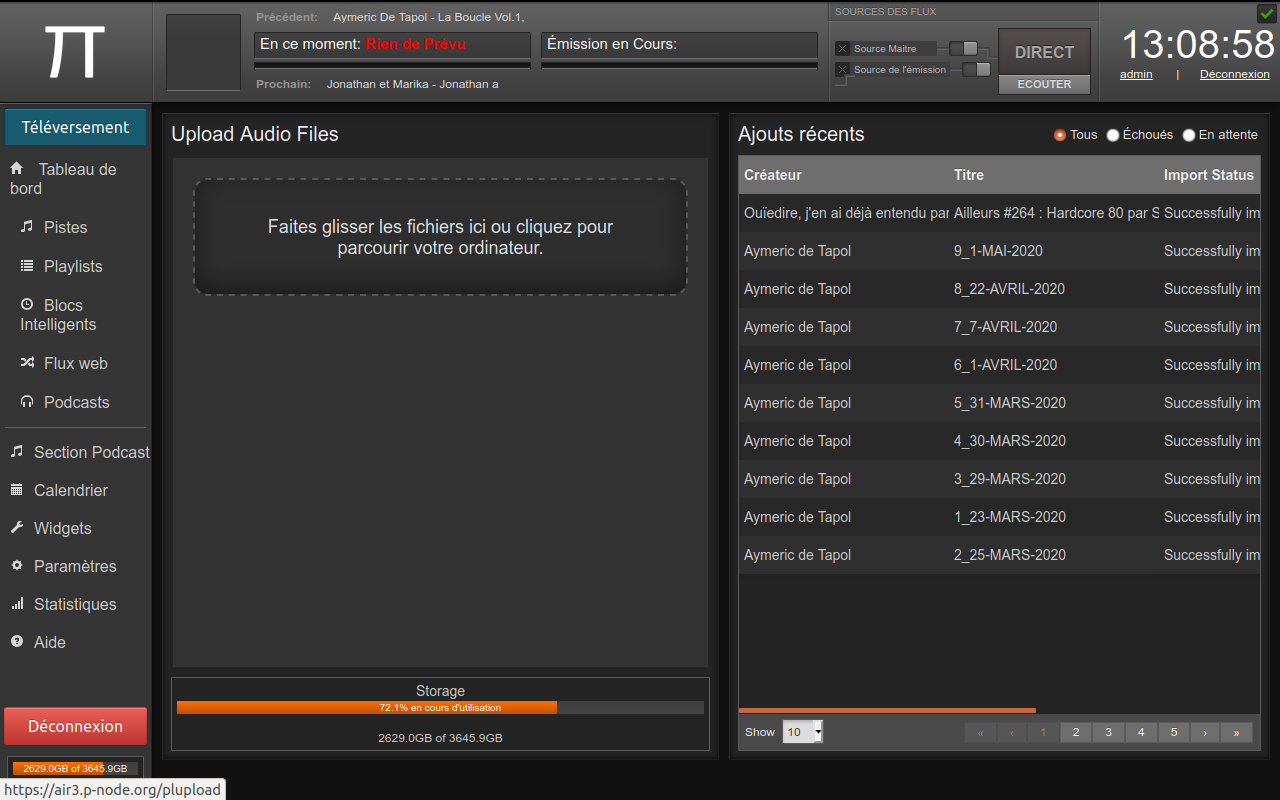
Once logged in, check the menu on the right. the first button is UPLOAD (in french TELEVERSER). Click on it to access the upload menu page.
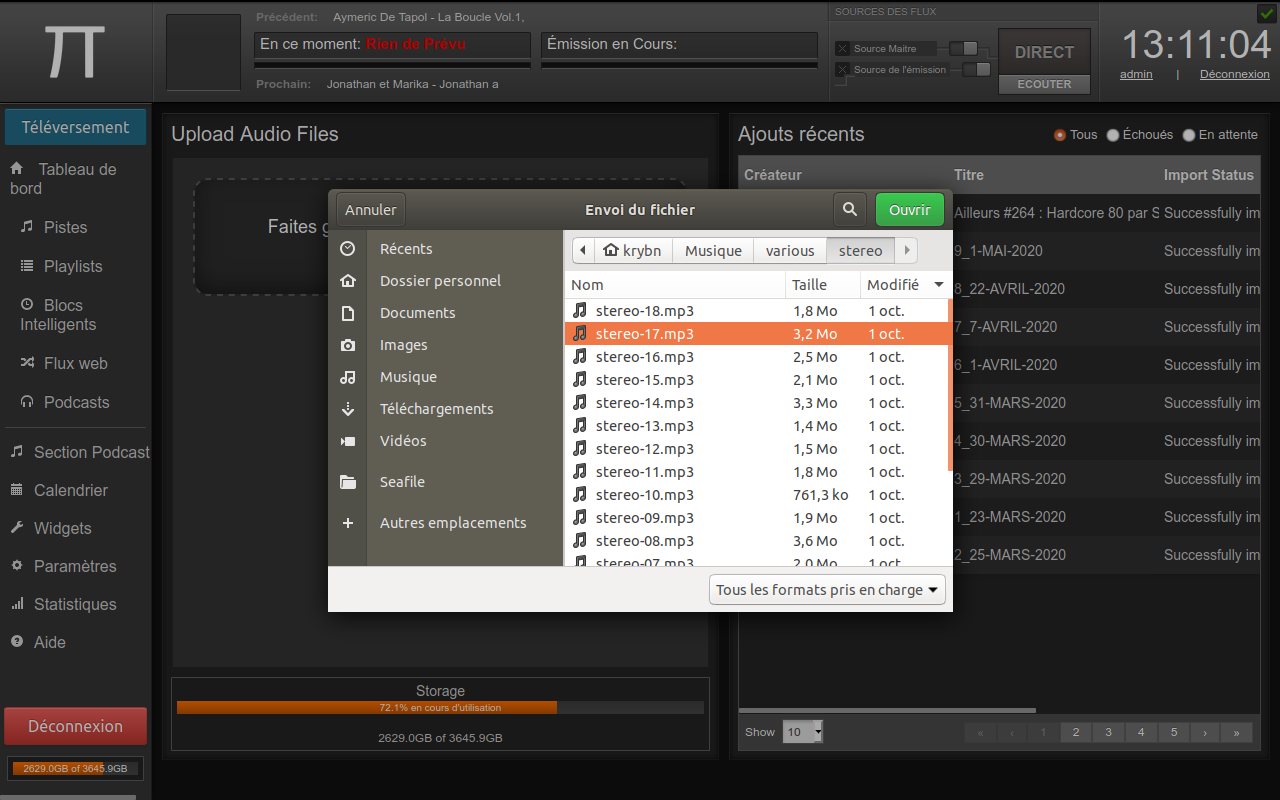
Once the page is open, drag and drop your file in the d&d section (left side), or click on it to browse the files on your computer. You'll see a progression bar indicating the upload status. Once the file is correctly uploaded, it will appear in the file menu on the right side, indicating if the upload has been successful, or unsuccesfull.
You can upload many file at the time.
We recommend to use light volume files, such as .mp3 192kbs or .ogg format.
Remember space on the server is limited, avoid large files and please delete the files after the broadcast.
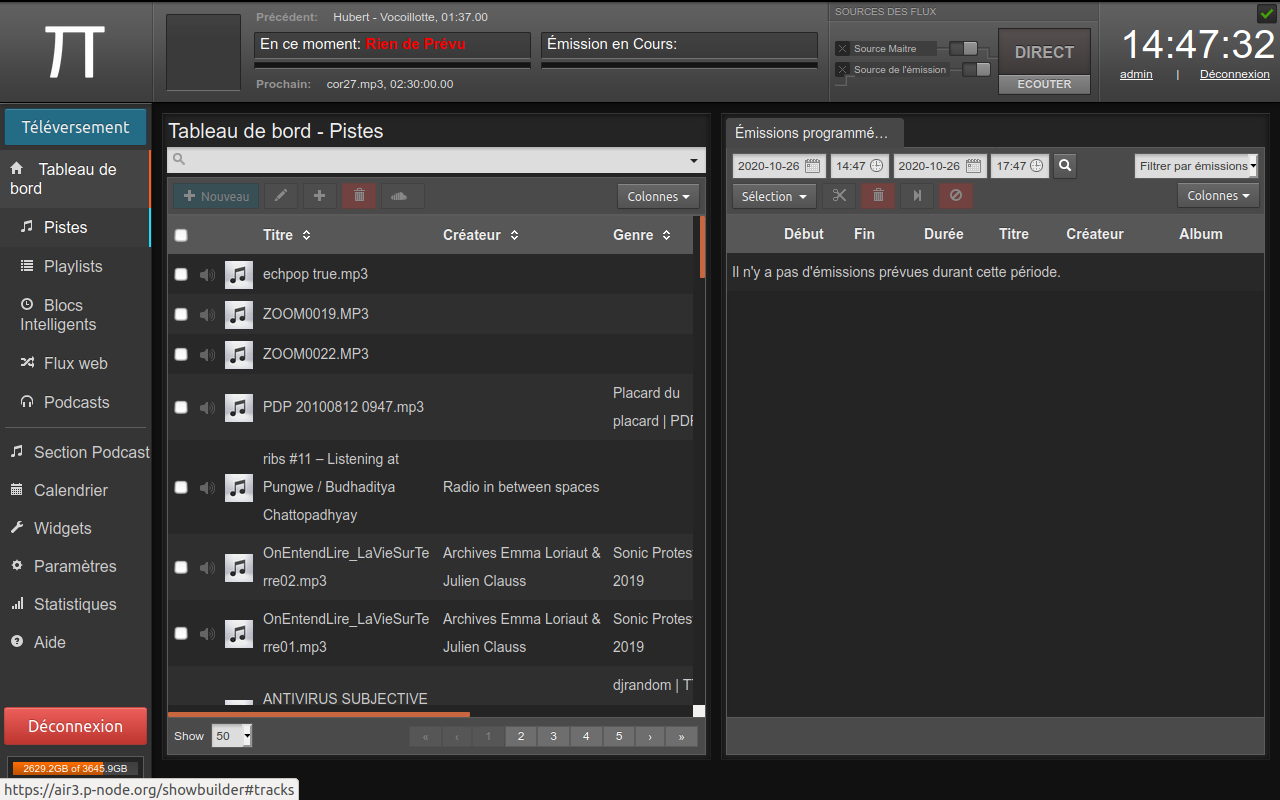
Go now in the tracks menu (Pistes). Here you can browse all file stored on the radio server.
You can display files alphabetically, or by using other criteria, such as time, date of upload, etc. You can enter some keywords to filter the results. If you just uploaded it, great are the chances the file is at the top of the list when displayed by upload date. ;)
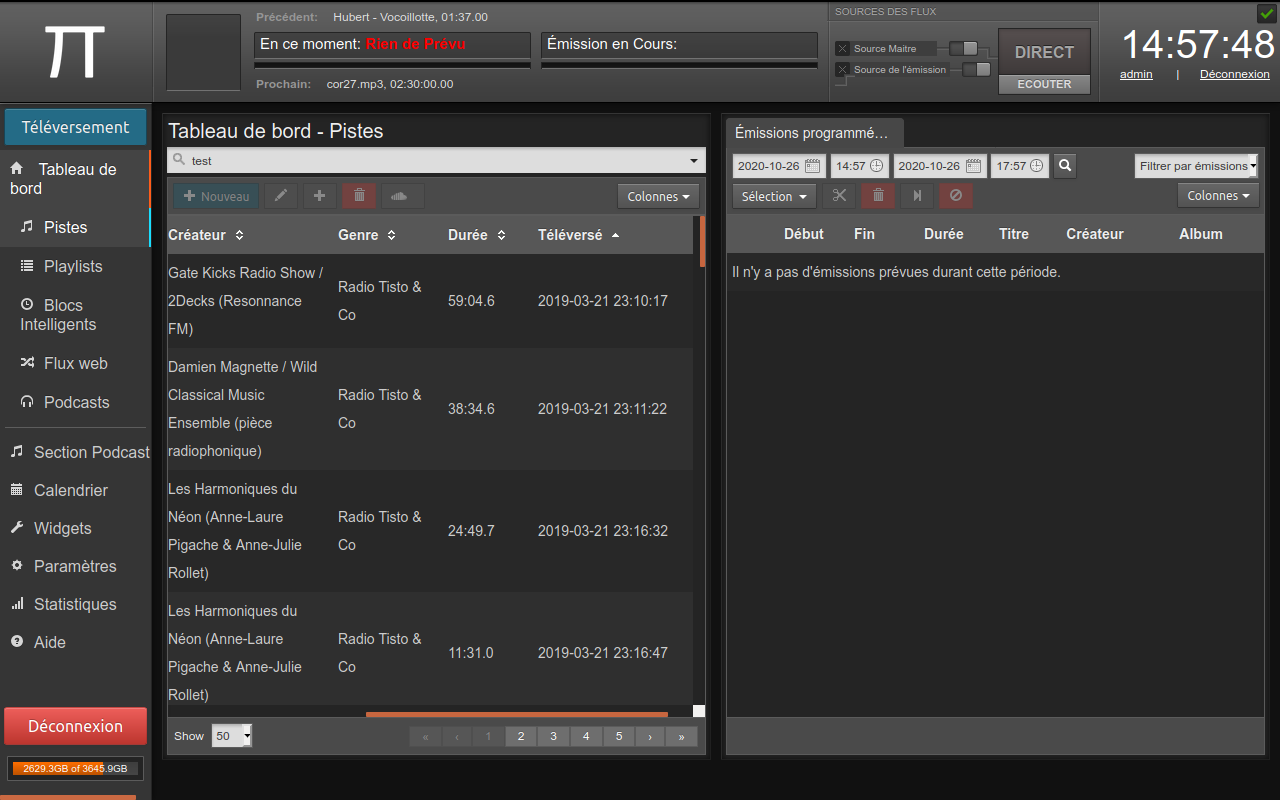
Once found your file, select it, and click on the [edition] button (pen icon). It will open the metadata manager. Here you can change the title, the author, indicates various informations (genre, label, date, etc.).
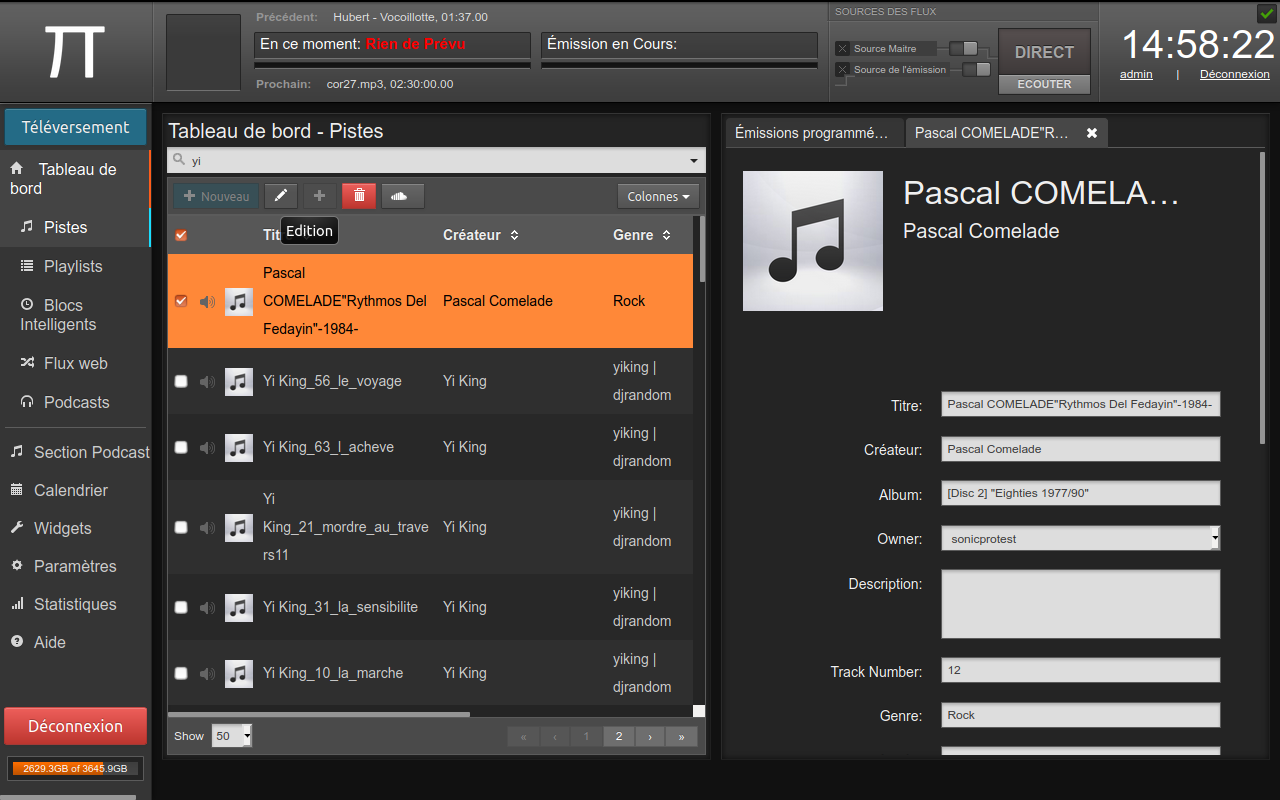
Validate !
Note : we use genre to generate automated playlists, be carefull what you indicate in this field. Also, remember that several metadata can be inserted in the same field !
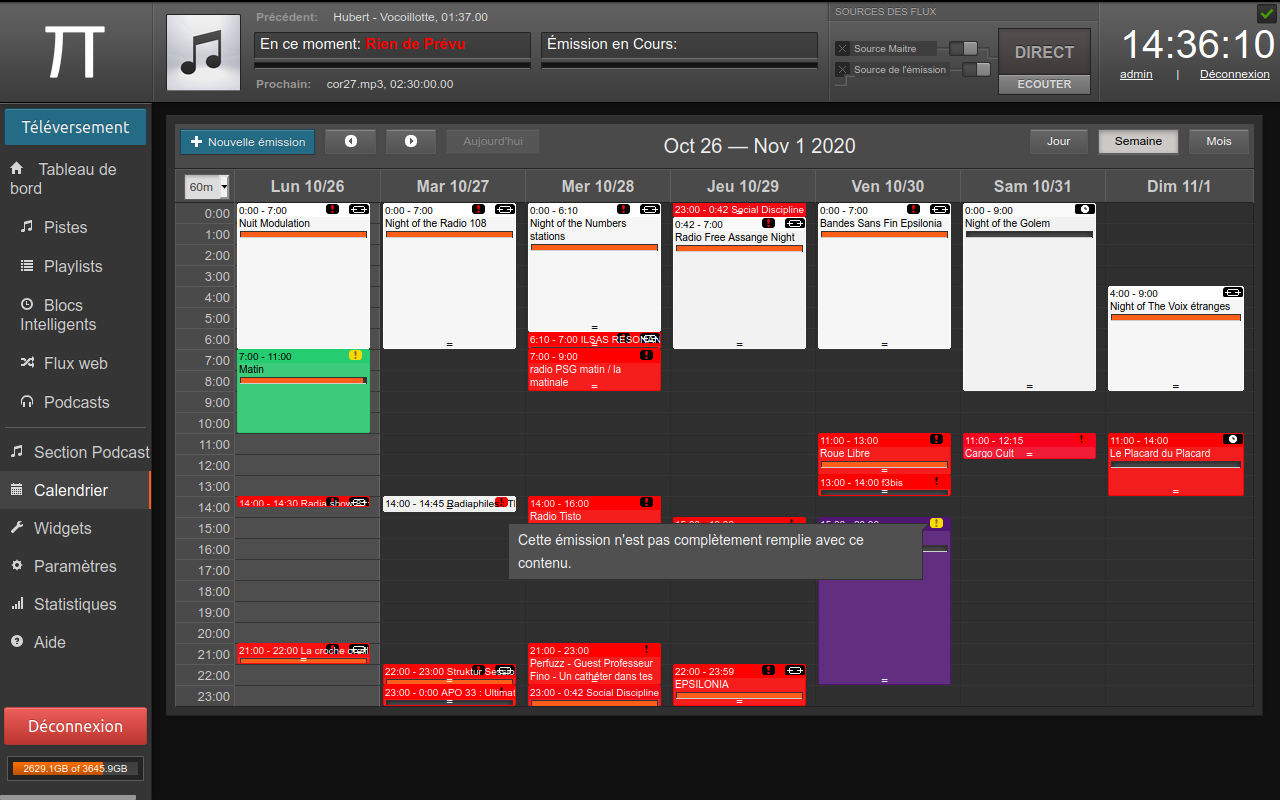
Once your file is uploaded. you ave to program it on the dab. for this go to the right menu, and click on Calendrier (Schedule). It will open the calendar where you see the shows.
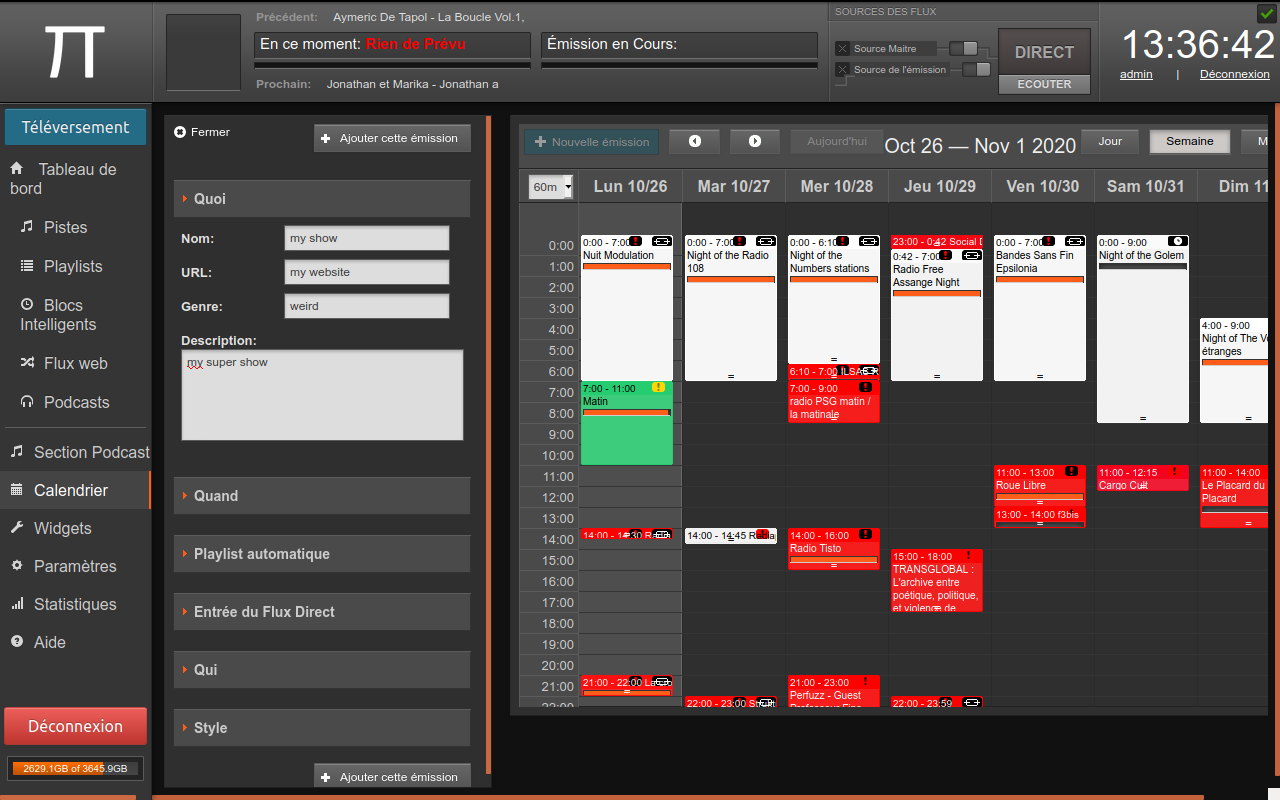
Click on the [+ new] blue button to create a new show. it will open the New Show editor.
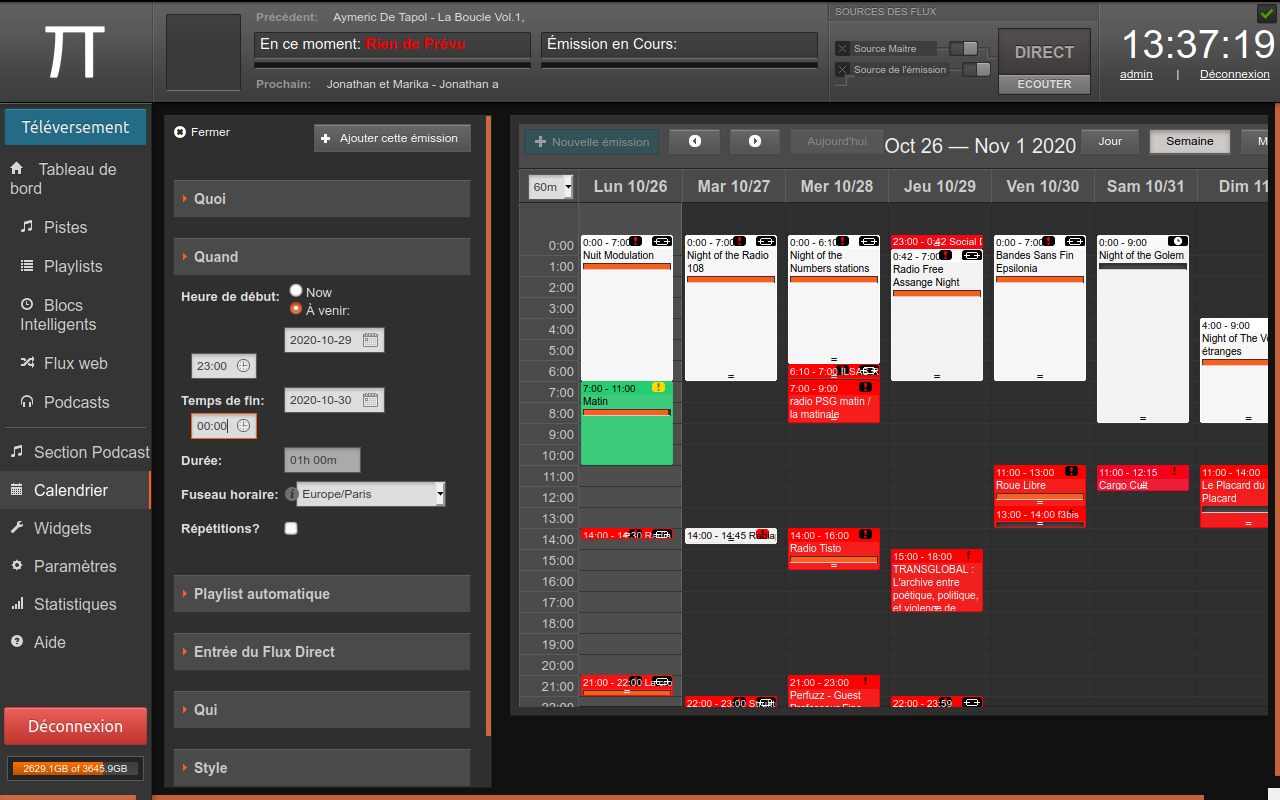
Enter first the WHAT section details of the show : Title of the show, Description, website. Be as precise as possible, it will appear on the website.
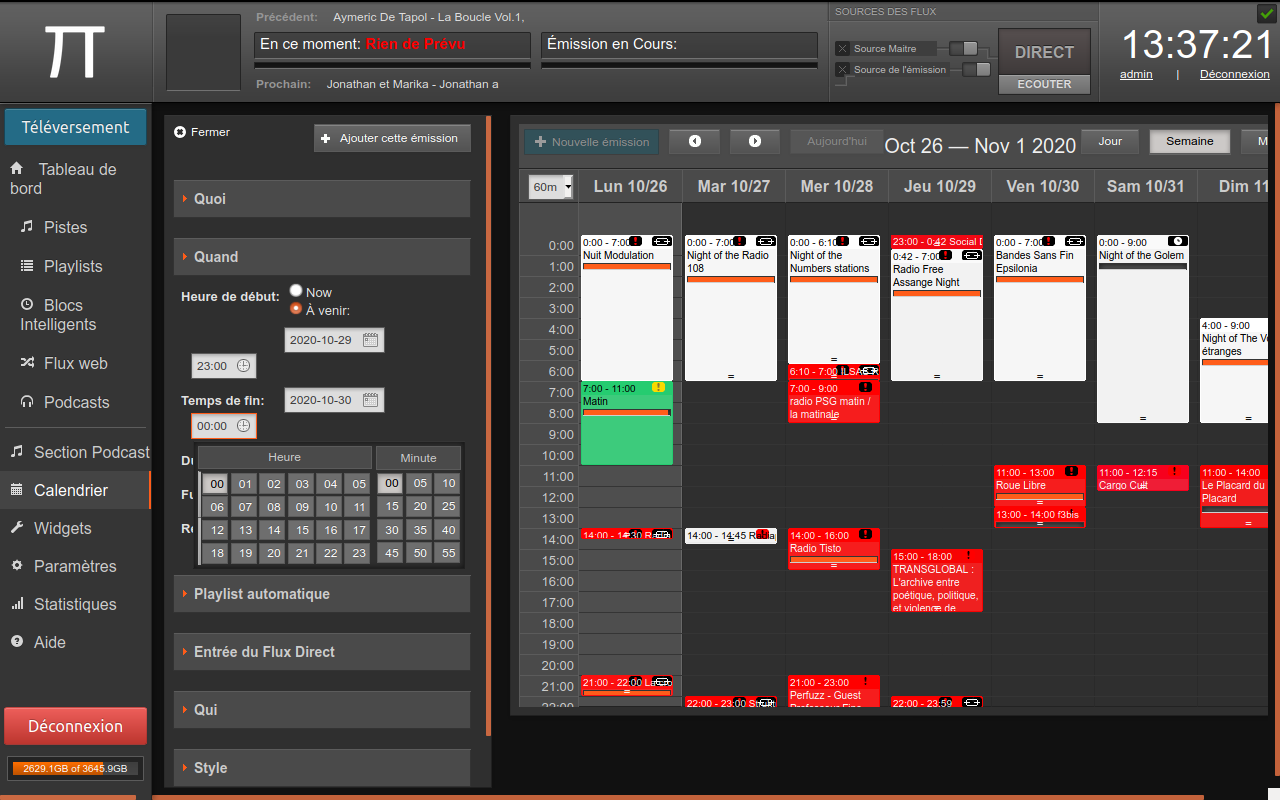
Then enters the WHEN details. It will indicate the date and start time of the broadcast, the date and end time of it, and thus the duration.
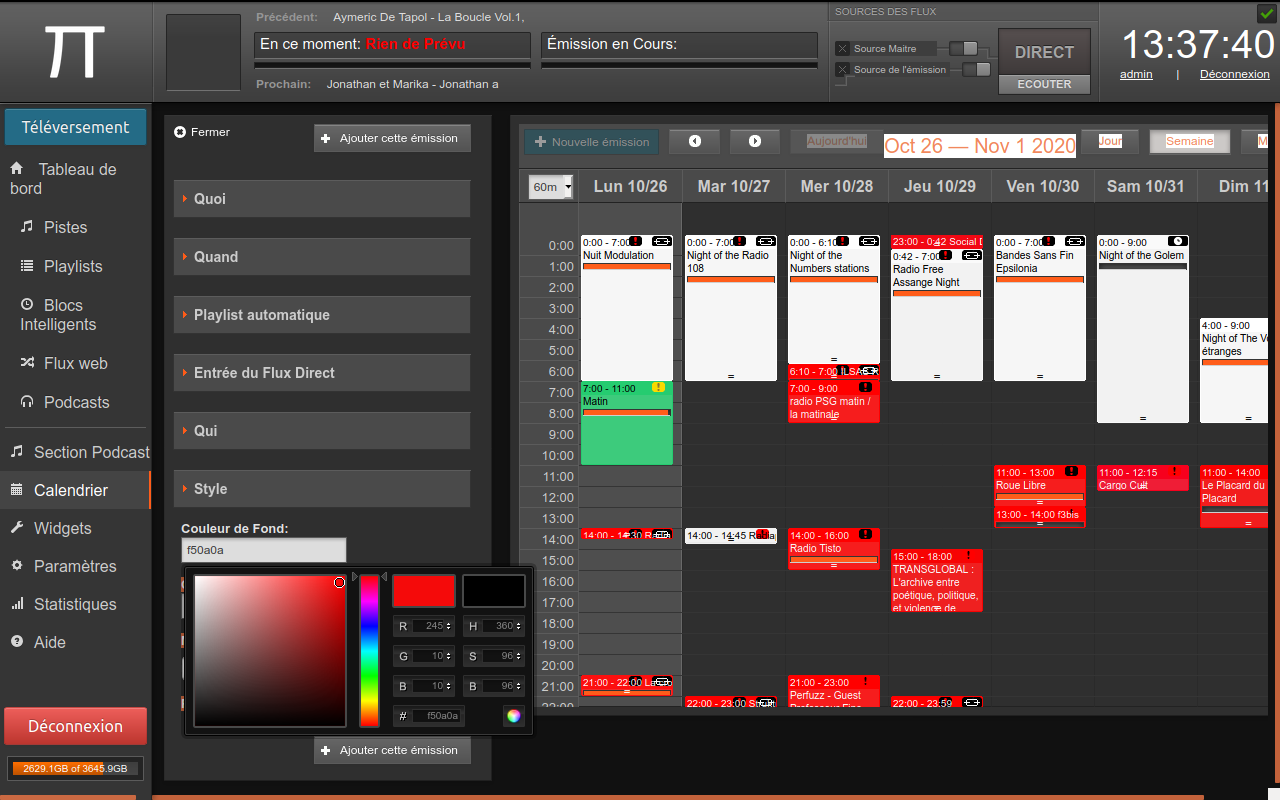
Then choose a color in STYLE. Red is for Live show, White for shows that can be replaced. Choose carefully as any shows that are not red can be replaced to give priority to live performances and interventions.
Now validate by pressing the button [+ Ajouter cette émission]. The show will appear in the schedule on the calendar. Please verify it is at the right date and time.
If it overlaps an existing show, the show will not be created.
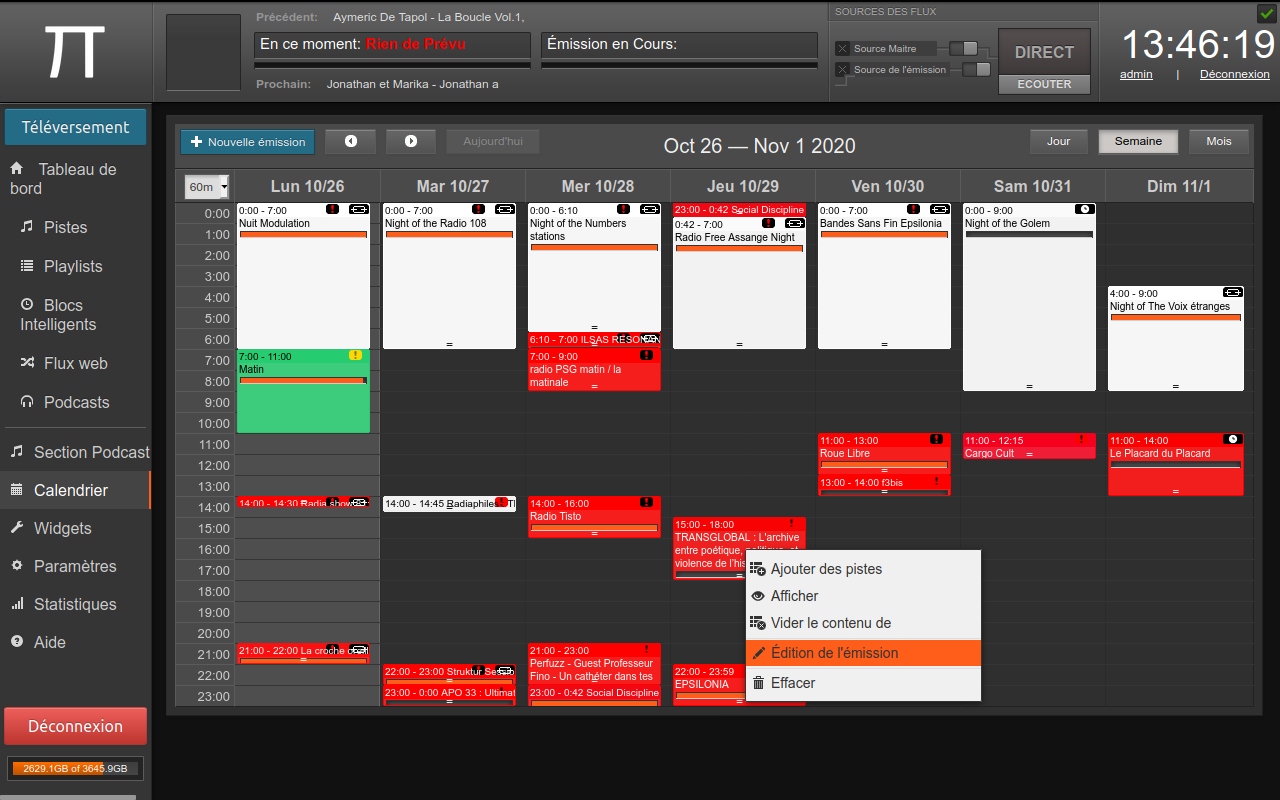
To correct any mistake, add information, you can edit a show to modify its details by clicking on the show in the calendar, and selecting : [edit show] (édition de l'émission).
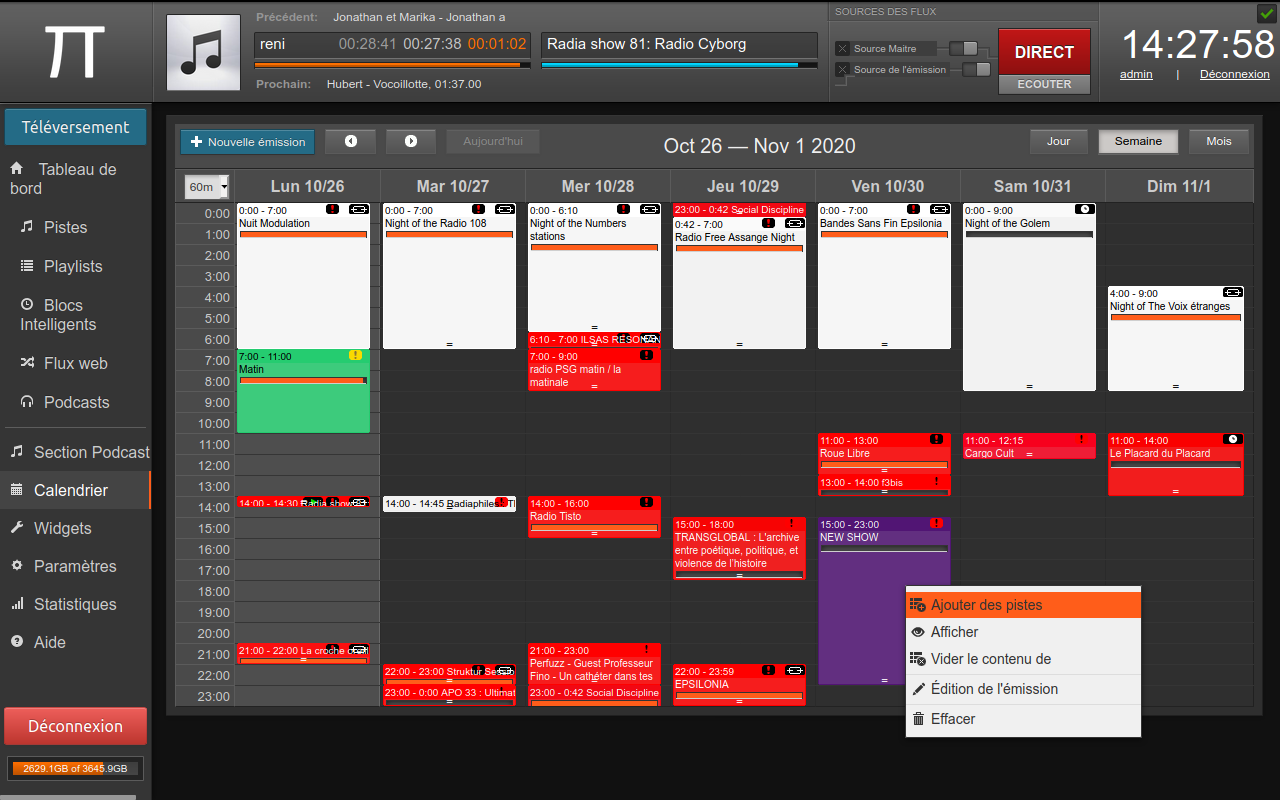
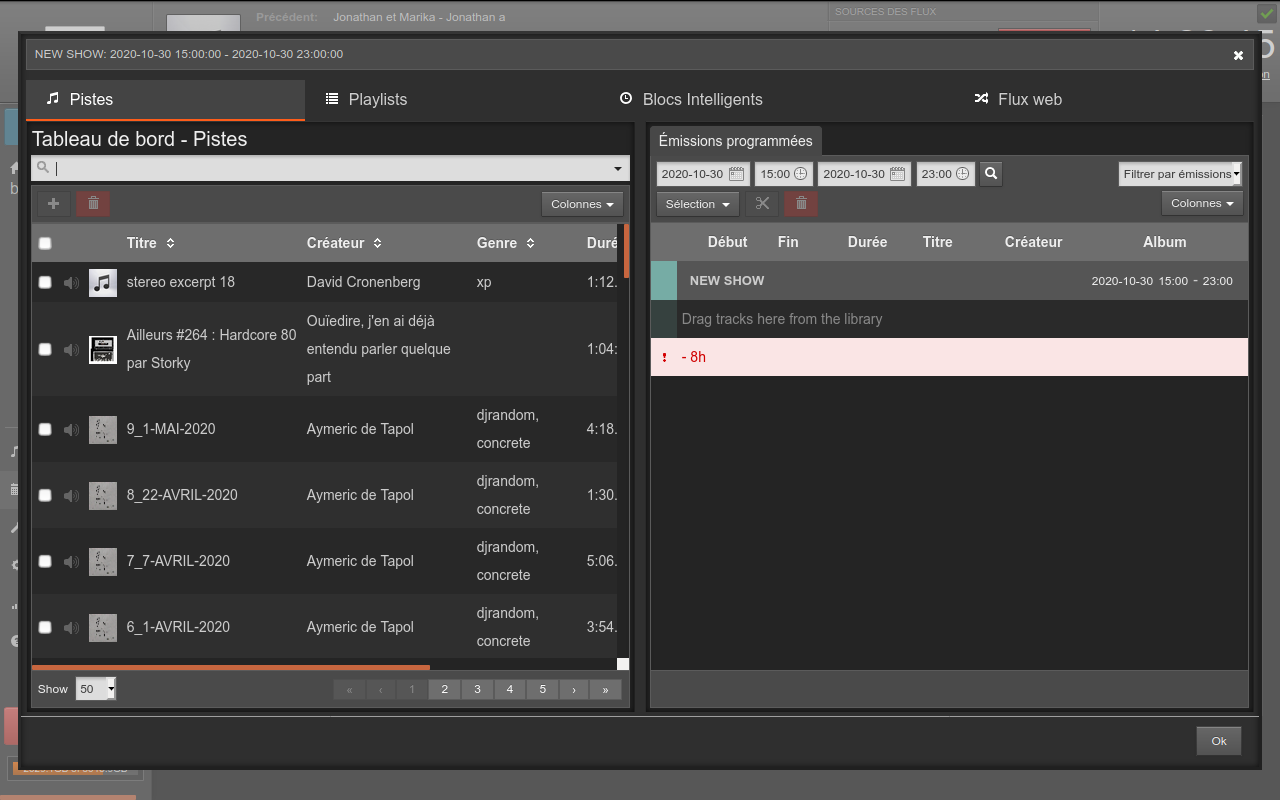
Now that the show has be created and scheduled in the calendar, we need to insert content. Click on your show and select in the menu [add content]. A new menu will pop up, where on the left, you have the tracks directory, allowing to browse all files and all streams on the server, and on the right, the content on the show.
First select the type of media you wanna put : Files, Playlists, Smart blocks or Webstreams.
Then, you can drag and drop an item to the right side, or double click an item, to arrange the content of your show.
Remember that :
During the setting phase of the content, the window will indicate you if your program exceeds the time of your show, of if it is too short in time.
Note that every time a new broadcast starts, it will start on time and therefore, overpass and cut every previous shows, even if they are not finished. So, be carefull with the timing of your shows, especially the one that slightly exceeds a given format.
Screenshots 1: click on the container and select add program
Screenshots 2: content manager of a given show
Screenshots 3: drag and drop
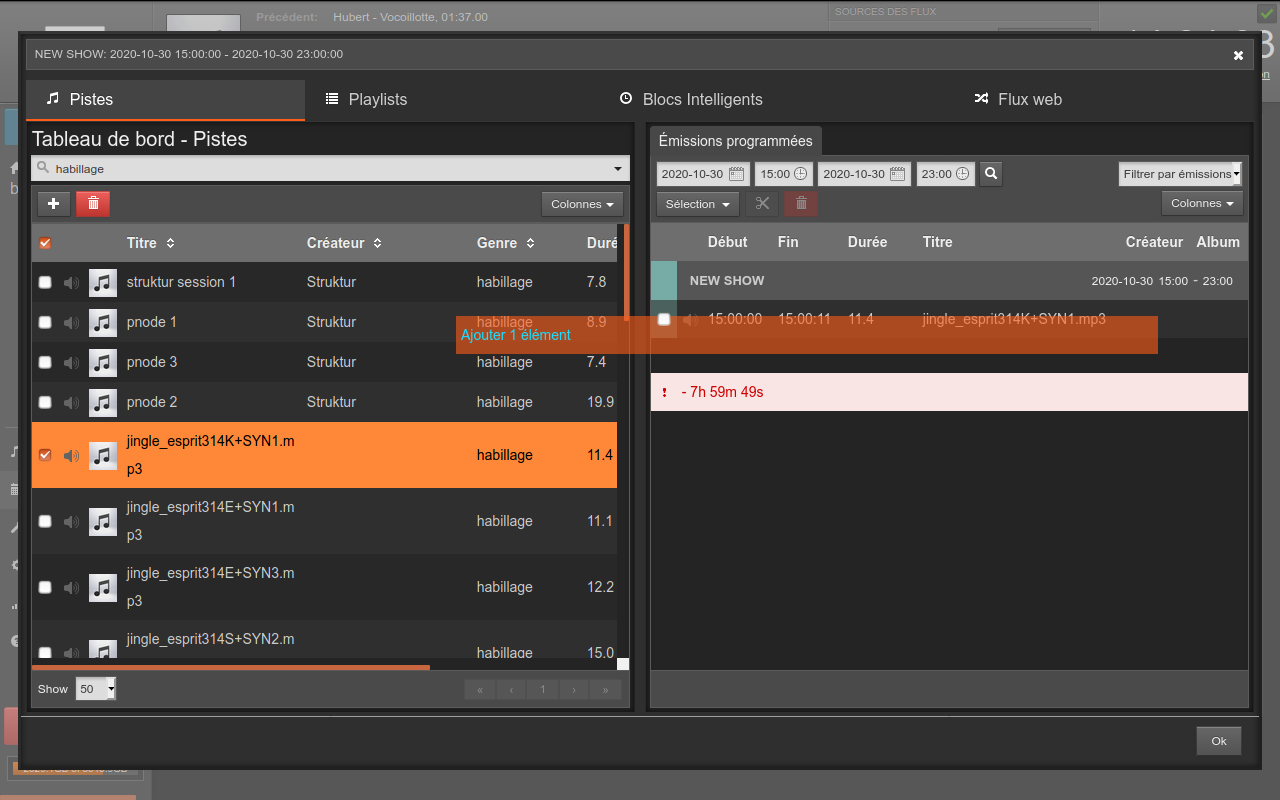
Screenshots 4: the duration of the content is shorter than the container
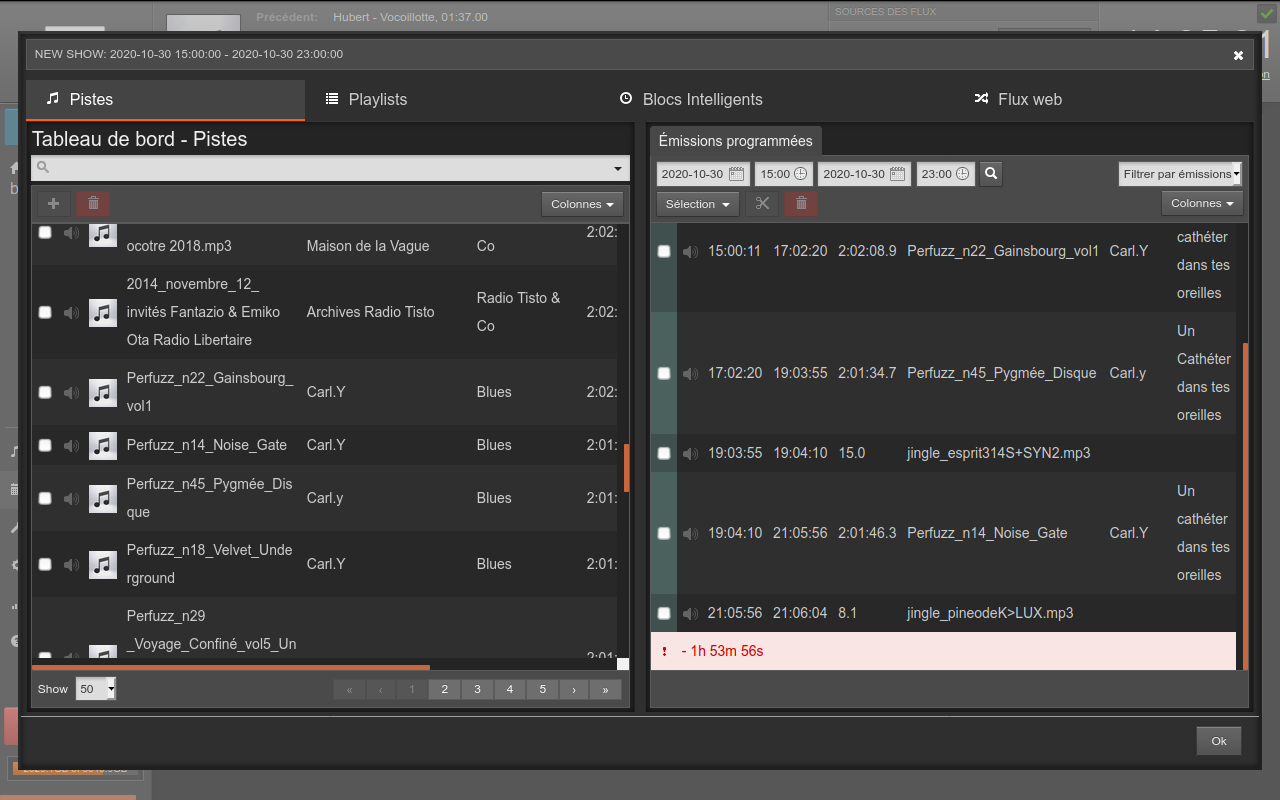
Screenshots 5: the duration of the content exceeds the time of the container
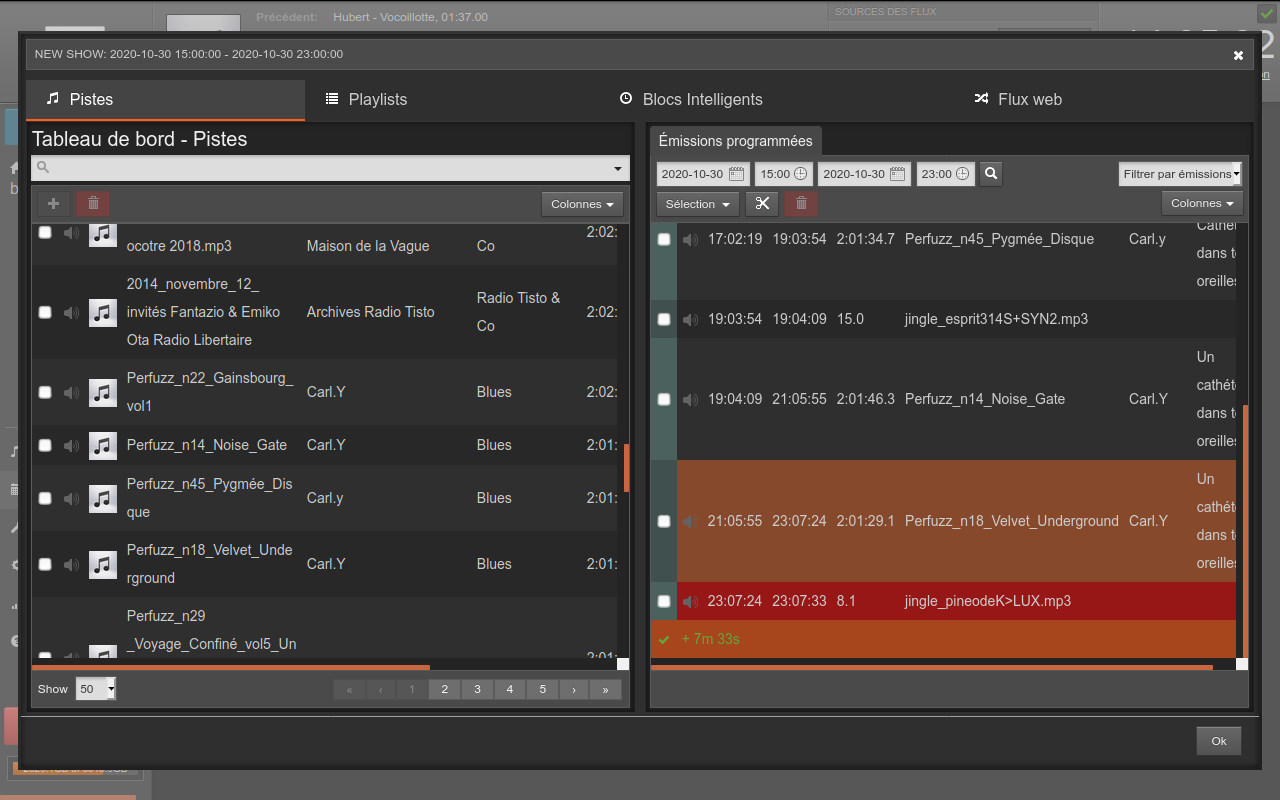
Screenshots 5: the container indicates the status of duration of the content (shorter/longer)
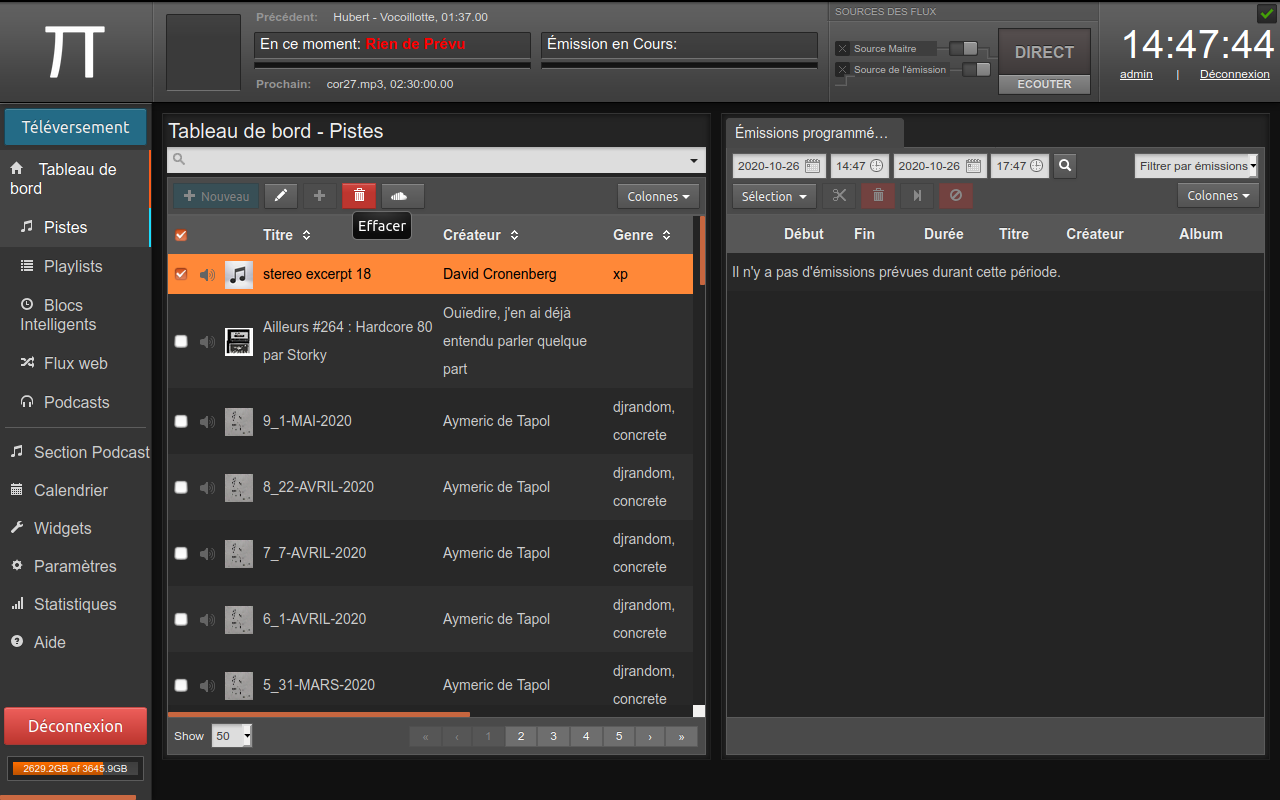
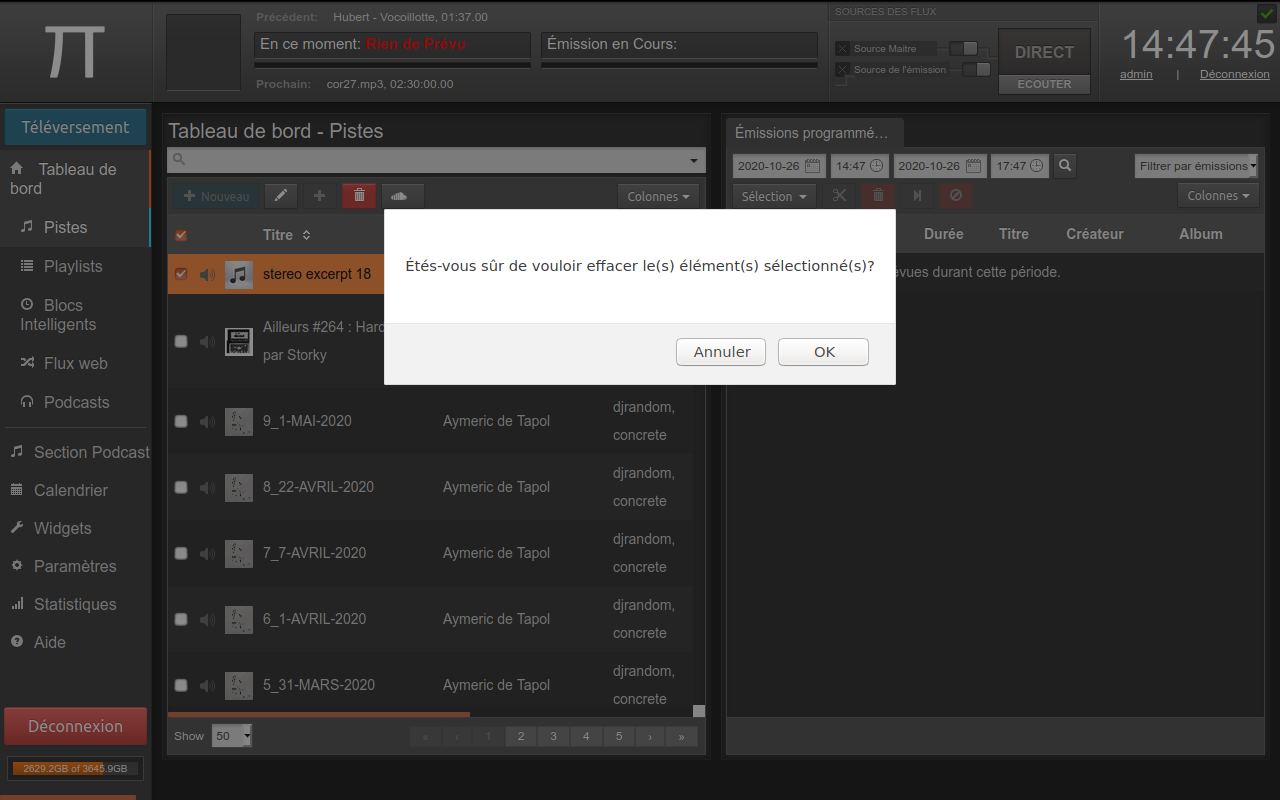
Because the storage space is not infinite, we ask content managers to erase their files after a broadcast, except if it enters a collective archive, or if it is aimed at being rebroadcasted.
For this,
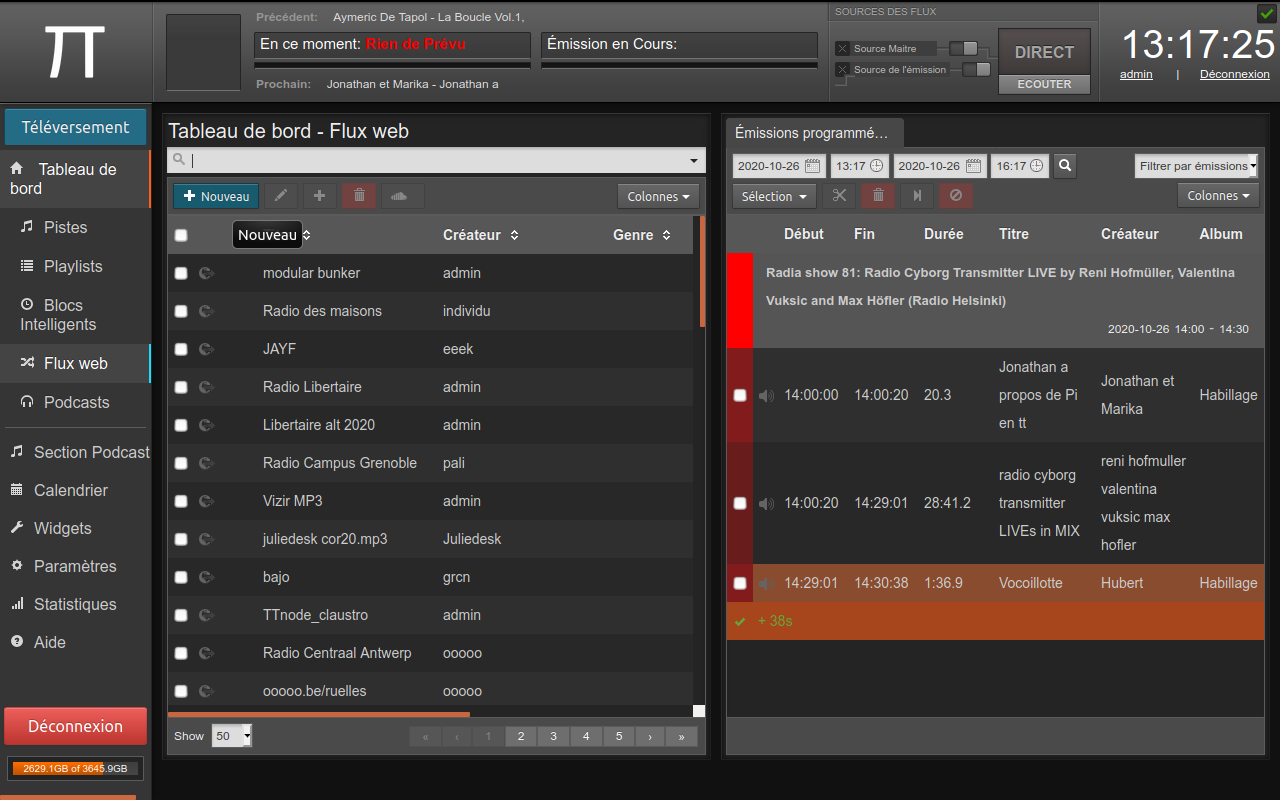
Go in the right menu, and click the Webstreams (Flux Web) to open the we stream manager. This is where a user can record a new stream to broadcast.
Click on the [+ new] blue button to add a new stream. It will open the stream editor.
Enter in the fields, the detail of your stream :
important to remember !!
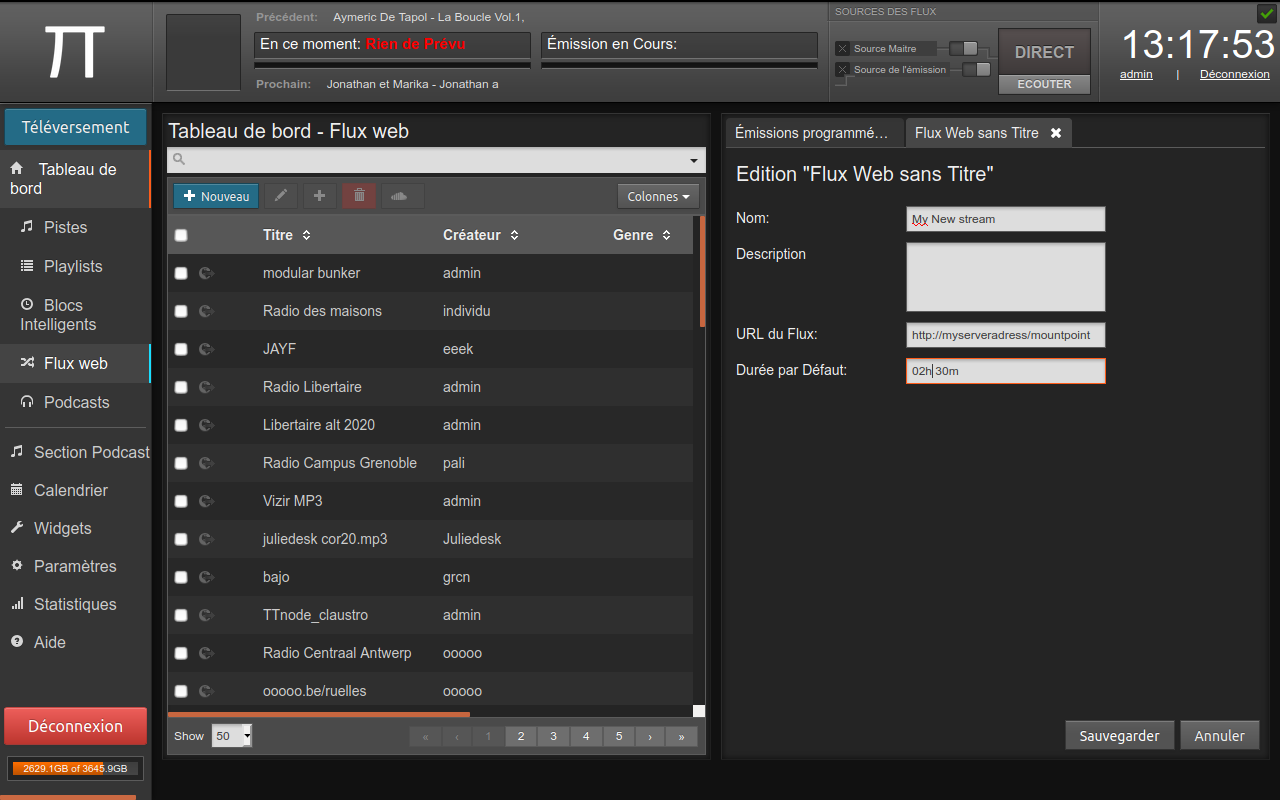
Note : It is the same process than in 2.3
Once your webstream has been created, you ave to program it on the dab. for this go to the right menu, and click on Calendrier (Schedule). It will open the calendar where you see the shows.

Click on the [+ new] blue button to create a new show. it will open the New Show editor.

Enter first the WHAT section details of the show : Title of the show, Description, website. Be as precise as possible, it will appear on the website.

Then enters the WHEN details. It will indicate the date and start time of the broadcast, the date and end time of it, and thus the duration.

Then choose a color in STYLE. Red is for Live show, White for shows that can be replaced. Choose carefully as any shows that are not red can be replaced to give priority to live performances and interventions.
Now validate by pressing the button [+ Ajouter cette émission]. The show will appear in the schedule on the calendar. Please verify it is at the right date and time.
If it overlaps an existing show, the show will not be created.
To correct any mistake, add information, you can edit a show to modify its details by clicking on the show in the calendar, and selecting : [edit show] (édition de l'émission).

Now that the show has be created and scheduled in the calendar, we need to insert your stream. Click on your show and select in the menu [add content]. A new menu will pop up, where on the left, you have the tracks directory, allowing to browse all content available on the server, and on the right, the content on the show.
First select the type of media you wanna put : Files, Playlists, Smart blocks or Webstreams.
Here we choose the Webstreams category.
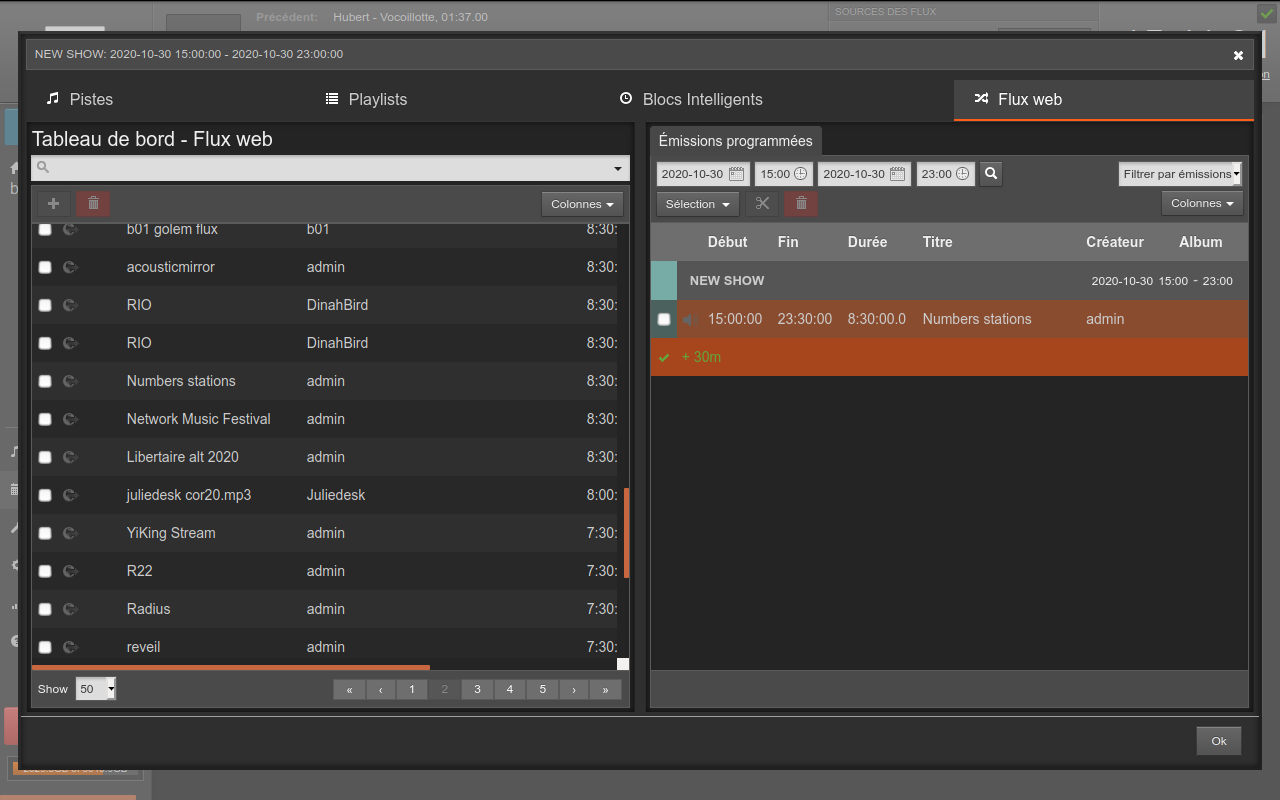
Then, you can drag and drop an item to the right side, or double click the item, to arrange the content of your show.
Remember that :
During the setting phase of the content, the window will indicate you if your program exceeds the time of your show, of if it is too short in time.
Note that TTnode is partly automated. Every time a new broadcast starts, it will start automatically, on time, and therefore, may overpass and cut every previous shows that would be running. So, be carefull with the timing of your live stream and finish on time !
Screenshots 1: click on the container and select add program

Screenshots 2: content manager of a given show

Screenshots 3: drag and drop

Screenshots 4: example where the duration of the content is shorter than the container

Screenshots 5: example where the duration of the content exceeds the time of the container

Screenshots 5: the container indicates the status of duration of the content (shorter/longer)

If you need to edit existing shows to arrange your own broadcast please keep in mind that two kinds of programs exists on Libretime. On the side of regular shows, we also have repetetive programs, that repeats at a regular schedule (every week, every month, ...).
When you edit those programs, be carefull to only edit the item in relation to your program, and not the whole series. The shows editor of regular shows have more options for deleteing (only this show, this shows and the others) or edit the time (only this show, this shows and the others). Be very carefull when you make changes to not erase or delete the program of someone else.
If you have troubles editing, come on TTnode irc to ask.
As said, in the calendar, white shows can be cancelled at will, to let space for live performances. However, red indicates the shows are live and cannot be erased.
Libretime proposes to arrange other kind of content, intitled Smart Blocs, Playlists and Podcasts. With some imagination, and allows content to repeat. One can acheive some imaginative and generative programs every week by looking at the details of the options. Usually, a playlist that embbeds a smart block, generated 1h before the show starts.
We recommend the Libretime documentation for this. A full and complete documentation can be found at : https://libretime.org/guides